
How can I add external buttons to the LCD kit’s OSD tactile switch?
 2026-05-18
  23:00
23:00 

Customizing an LCD kit with external buttons involves mapping new tactile switches or inputs to the evaluation hardware’s existing OSD controller, requiring careful consideration of electrical compatibility, GPIO pin assignment, and firmware configuration to create a seamless and user-friendly interface.
How do you identify compatible GPIO pins for external buttons on an LCD kit?
Identifying compatible GPIO pins starts with the evaluation board’s schematic and datasheet. You need to locate unused, user-configurable pins that support digital input with internal pull-up or pull-down resistors. It’s crucial to verify the pin’s voltage tolerance matches your external button circuit to prevent damage.
To begin, procure the technical documentation for your specific LCD kit controller, such as a common OSD chip. These documents detail each pin’s multiplexed functions, default state, and electrical characteristics. A pro tip is to first test potential pins with a multimeter in circuit; a pin reading a steady logic high or low is likely free, while a fluctuating one may be tied to another function. Think of the GPIO header as a neighborhood’s power grid; you need to find an unused outlet with the correct voltage before plugging in a new appliance, otherwise you risk a short circuit. Why would you assume a pin labeled “GPIO5” is automatically available? Doesn’t the display’s own backlight or touch controller sometimes share those same resources? Subsequently, after confirming electrical compatibility, you must ensure the development environment or firmware SDK allows you to reconfigure that specific pin as a digital input. Finally, always cross-reference the pin mapping against the physical connector on your kit to avoid simple wiring errors during implementation.
What are the key electrical considerations when wiring external tactile switches?
The primary electrical considerations include debouncing the switch signal, implementing proper pull-up or pull-down resistors, and calculating appropriate current-limiting resistors if using an LED. You must also account for voltage level translation if the button circuit operates at a different logic level than the microcontroller.
Mechanical switches are imperfect and create multiple rapid on-off transitions, known as bouncing, when pressed or released. This can be interpreted as multiple presses by a fast microcontroller. A simple hardware debounce circuit uses an RC filter and a Schmitt trigger to clean the signal, though many developers opt for software debouncing in code. The choice between an internal pull-up resistor and an external one depends on the microcontroller’s capabilities and the desired default logic state; an external resistor often provides more stable and consistent performance. For instance, wiring a switch without a pull-up is like a door that isn’t clearly shut or open—it floats unpredictably with electrical noise. How can you ensure a single press isn’t registered as a dozen? What happens if electrostatic discharge from a user’s finger travels down the wire? Moreover, if your switch includes an indicator LED, a current-limiting resistor is non-negotiable to prevent burning out the LED or overloading the GPIO pin. Transitioning from theory to practice, always prototype your button circuit on a breadboard before soldering connections to the main board. This allows you to verify signal integrity with an oscilloscope and confirm the logic levels are clean and within specification.
Which firmware modifications are required to map new button inputs?
Firmware modifications typically involve initializing the new GPIO pins as inputs, configuring internal resistors, writing an interrupt service routine or polling function to detect state changes, and implementing a software debounce algorithm. You must then map the detected button press to a specific function, such as navigating an on-screen menu.
The process begins in the initialization code, where you set the pin mode and enable the internal pull-up resistor if available. Next, you decide on an input detection method: polling checks the pin state in a loop, while interrupts immediately halt the main program when a change occurs. Interrupts are more efficient for responsive interfaces but require careful management to avoid conflicts. The debounce logic, often a simple delay that ignores further changes for20-50 milliseconds after the first detection, is critical. You then create a function that translates the physical pin number into a logical “Button A” or “Menu” event. Consider this like programming a universal remote; you must first teach it the infrared codes (pin setup), then program which button triggers which device command (event mapping). But what if two buttons are pressed simultaneously? Does your code handle that gracefully or lock up? Furthermore, you may need to modify the existing OSD menu driver library to accept these new hardware events as valid inputs. Finally, thorough testing is mandatory—simulate rapid presses, long holds, and multiple button combinations to ensure the system remains stable and the user experience is intuitive.
What is the step-by-step process for integrating an external button panel?
| Step | Primary Action | Key Tools & Checks | Common Pitfalls to Avoid |
|---|---|---|---|
| 1. Planning & Design | Review kit schematics, select GPIO pins, design button circuit with debouncing and pull resistors. | Datasheet, circuit simulation software, notebook for pin assignments. | Choosing pins used for boot configuration or critical display signals, which can render the kit inoperable. |
| 2. Hardware Prototyping | Solder buttons and resistors to a prototype board, connect to kit header via jumper wires for testing. | Breadboard, soldering iron, multimeter, oscilloscope for signal analysis. | Creating short circuits with loose wires, applying incorrect voltage, or forgetting the current-limiting resistor for an LED. |
| 3. Firmware Development | Write and compile code for pin initialization, input detection, debouncing, and event mapping. | IDE (e.g., Keil, IAR), SDK for the display controller, serial debugger. | Incorrect interrupt priority settings causing display lag, or inefficient polling that consumes too much CPU time. |
| 4. Integration & Testing | Flash the new firmware, conduct functional tests for single/multi-press, long press, and system stability. | Flash programmer, logic analyzer, the actual end-use enclosure if available. | Not testing under real-world EMI conditions, leading to sporadic glitches after final assembly. |
| 5. Final Assembly | Permanently install the button panel into the product enclosure, secure all connections, and perform final validation. | Strain relief for cables, conformal coating if needed, final quality assurance checklist. | Poor mechanical mounting causing button misalignment or stress on solder joints, leading to future failures. |
How does button customization differ between resistive and capacitive touch LCD kits?
For resistive touch kits, external buttons provide a complementary, tactile input method separate from the touchscreen layer. With capacitive touch kits, external buttons are often used to replace or augment touch functions in environments where gloves, moisture, or precision are concerns, requiring different integration approaches in the controller firmware.
Resistive touchscreens and external buttons are fundamentally similar from an electrical standpoint—both are essentially variable resistors closing a circuit. This often means the same GPIO polling or interrupt techniques apply to both, and they can sometimes share an analog-to-digital converter channel. In contrast, capacitive touchscreens work by sensing changes in an electrostatic field, a completely different technology managed by a dedicated IC. Adding physical buttons to a capacitive system typically involves treating them as entirely separate digital inputs. For example, a medical device might use a capacitive touchscreen for rich graphical menus but rely on sealed tactile buttons for critical, glove-friendly emergency controls. Doesn’t it make sense to have a physical “home” button even on a touch-centric device? How do you maintain a consistent user experience when mixing input types? Consequently, the firmware architecture diverges: resistive systems may have a unified input driver, while capacitive systems require a hybrid driver managing two distinct input subsystems. Furthermore, the mechanical integration differs, as capacitive displays are often laminated front-of-glass assemblies, making it trickier to route wires for side buttons without affecting the sleek design.
What are the common challenges and troubleshooting tips for external button integration?
| Challenge Category | Specific Symptom | Root Cause | Troubleshooting & Resolution |
|---|---|---|---|
| Electrical Issues | Button presses register sporadically or not at all; phantom presses occur. | Floating input pin (missing pull resistor), excessive bounce, voltage mismatch, or poor wiring connection. | Use a multimeter to check for stable voltage on the pin when the button is not pressed. Add an external10kΩ pull-up resistor and a0.1µF capacitor for hardware debouncing. |
| Firmware & Software | System freezes when a button is pressed, or the display becomes unresponsive. | Interrupt service routine is too long, conflicts with display refresh interrupts, or stack overflow from recursive calls. | Simplify the ISR to only set a flag and exit. Check interrupt priority levels in the controller. Use debugging tools to monitor stack usage during an event. |
| Mechanical & Physical | Button feels unresponsive or requires excessive force; inconsistent actuation. | Button misaligned in enclosure, wrong switch type (e.g., using a high-force switch for a delicate interface), or worn contacts. | Verify button alignment before final mounting. Select a switch with an appropriate actuation force (e.g.,160gf for tactile feedback). Test the switch standalone before integration. |
| Integration & System-Level | Buttons work in isolation but fail when the display is updating or during high CPU load. | Resource contention, insufficient power supply current when backlight is at max, or ground loop noise. | Measure power rail stability with an oscilloscope during a button press. Ensure a single-point ground for digital and power grounds. Add a small delay in the main loop to yield CPU time. |
Expert Views
The integration of external controls into a modern display interface is a nuanced engineering task that bridges hardware and software domains. Success hinges on a systems-thinking approach. You cannot treat the button as an isolated component; its performance is interdependent with power integrity, firmware architecture, and mechanical design. A common oversight is underestimating the environmental robustness required—a button that works perfectly on a lab bench may fail in a vibrating or humid environment. Another critical insight is to design the firmware for testability from day one. Implement debug commands that report the raw button state and event counters over a serial port. This data is invaluable for diagnosing field issues. Always consider the full product lifecycle, including how a user will perceive the tactile response and how the assembly can be serviced. The goal is to create an interface that feels intuitive and reliable, making the underlying technology transparent to the end-user.
Why Choose CDTech
Engaging with a specialist like CDTech for display customization projects brings distinct advantages rooted in deep technical experience. Their team possesses extensive knowledge of the internal workings of various LCD controllers and OSD chips, which is precisely the expertise needed when you need to map custom external inputs. They understand the electrical characteristics and firmware hooks of their own evaluation kits intimately, which can drastically reduce your development risk and timeline. This experience translates into practical guidance on which GPIO lines are truly free for user applications and which are best left alone. Furthermore, CDTech’s approach as a solution provider means they consider the entire integration challenge, not just the display component. Their engineers can offer insights on common pitfalls, from signal integrity to mechanical mounting, that a pure component supplier might not address. This holistic, problem-solving perspective is invaluable for developing a polished, reliable final product.
How to Start
Begin by clearly defining the functional requirements for your external buttons: how many are needed, what are their intended actions, and what is the desired tactile feel? Next, gather all technical documentation for your specific CDTech LCD kit, focusing on the controller datasheet and the evaluation board schematic. Create a simple block diagram linking your proposed buttons to the kit’s GPIO header. Then, set up a basic prototyping environment with a breadboard, tactile switches, resistors, and jumper wires. Before writing any code, use a multimeter to verify your understanding of the kit’s pinout and voltage levels. With hardware verified, proceed to modify the example firmware provided with the kit, starting with a single button to establish the workflow. Iteratively test each function, adding complexity like long-press detection only after the basic press-and-release works flawlessly. This methodical, step-by-step approach de-risks the customization process.
FAQs
Can I add external buttons to any LCD kit from CDTech?
Most evaluation kits from CDTech are designed with some degree of expandability, but the feasibility depends on the specific controller chip and board layout. Kits with dedicated OSD controllers and exposed GPIO headers are ideal. It is essential to consult the kit’s documentation or directly inquire with their engineering support to confirm available user I/O before proceeding with your design.
Does adding external buttons void the warranty on the LCD kit?
Modifying the evaluation hardware, such as soldering wires directly to the board, can potentially affect the warranty. Best practice is to use the designated expansion connectors if available. For any significant modification, it is advisable to discuss your project with CDTech support first. They can often recommend a compatible approach or a more suitable kit model that supports your customization needs without compromising the product’s integrity.
What is the typical lead time for a custom display solution with integrated buttons?
Lead times vary significantly based on the complexity of the customization. A simple firmware modification for an existing kit might take a few weeks, while a fully custom display module with a bespoke button panel integrated into the frame can take several months. The process involves electrical design, firmware development, prototyping, and validation. Early engagement with the CDTech project team is the best way to get an accurate timeline for your specific requirements.
Are there pre-programmed functions for external buttons in the standard firmware?
Standard firmware for evaluation kits is typically written to demonstrate core display functionality and may not include handlers for external user buttons. However, the underlying driver libraries often contain the necessary functions for GPIO control, which you can call from your custom application code. You will generally need to write the button scanning and event mapping logic yourself, using the provided SDK as a foundation.
Successfully customizing an LCD kit with external buttons elevates a standard display into an interactive product interface. The journey requires a meticulous blend of electrical engineering, firmware development, and mechanical integration. Key takeaways include the non-negotiable need for proper signal conditioning, the importance of a robust firmware architecture, and the value of iterative prototyping. Start simple, validate each assumption with measurement, and build complexity gradually. By understanding the system-level interactions between your new buttons and the existing display hardware, you can create an interface that is both powerful and reliable. Remember, the ultimate goal is to make the technology recede into the background, providing the user with a seamless and intuitive control experience. Partnering with experienced providers like CDTech can provide the technical foundation and guidance to turn this customization challenge into a successful product feature.
Post Search
Related Articles
-
Capacitive vs Resistive Touch Screen Car Stereo: Which Is Right for You?
-
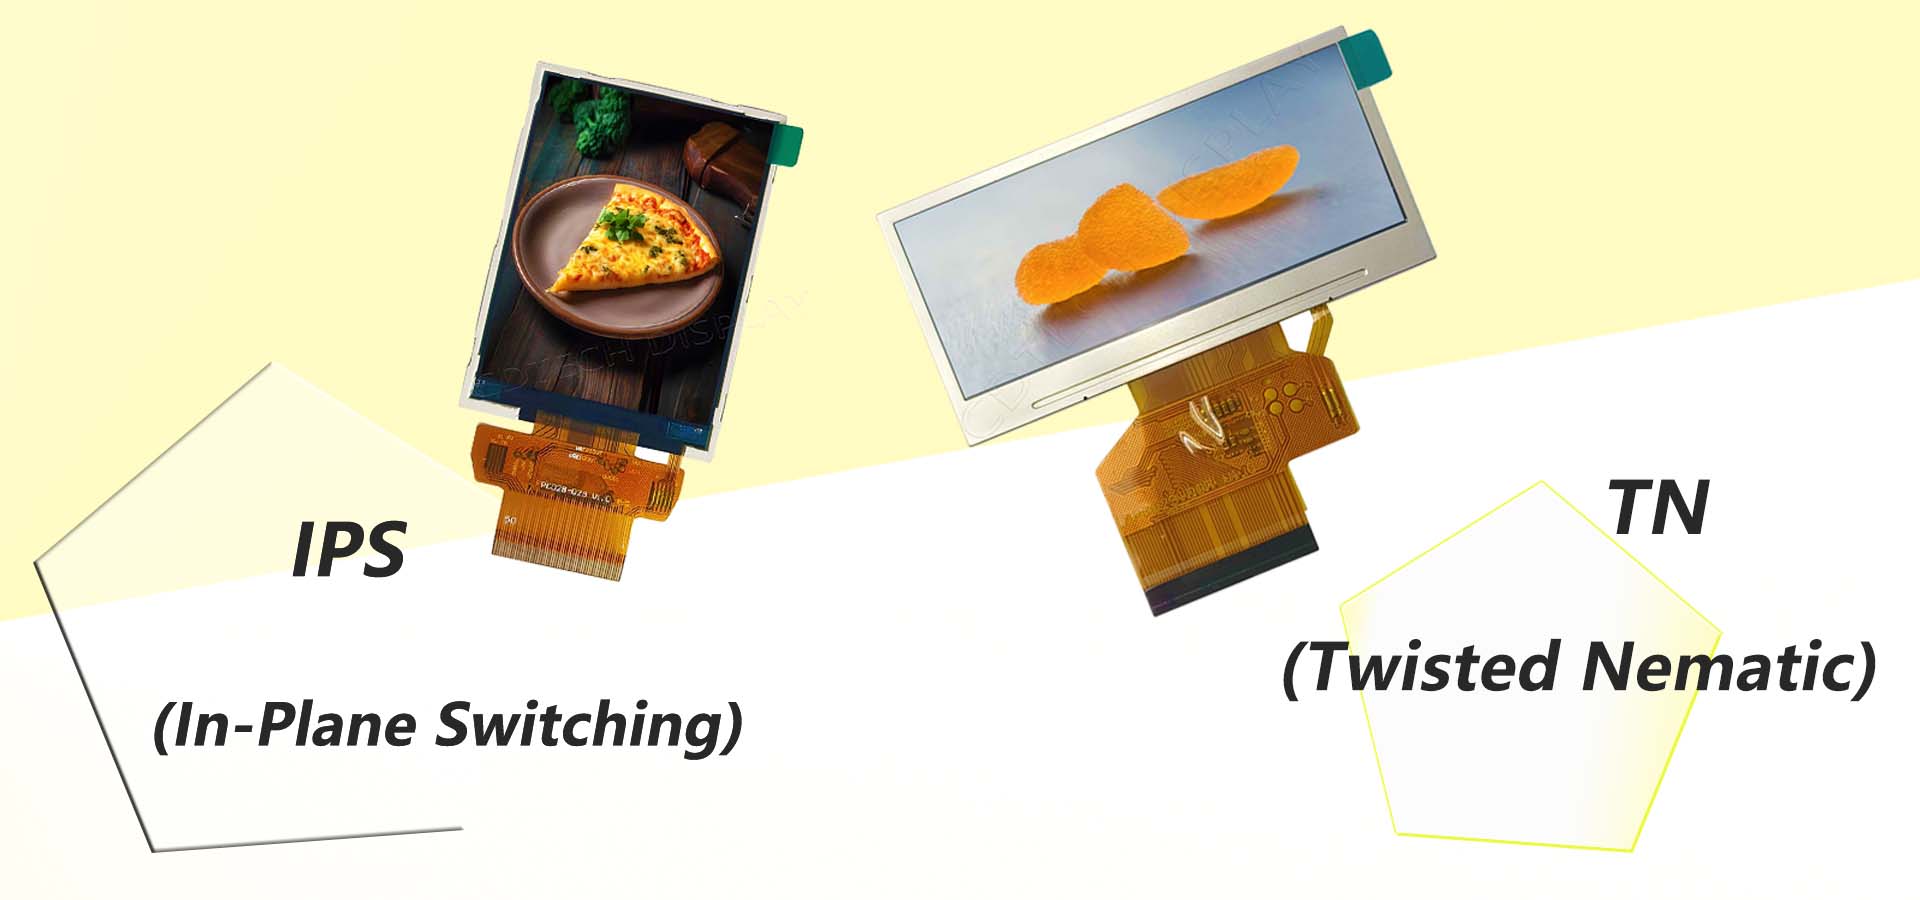
TN LCD vs IPS LCD: How to Choose the Right Display for You
-
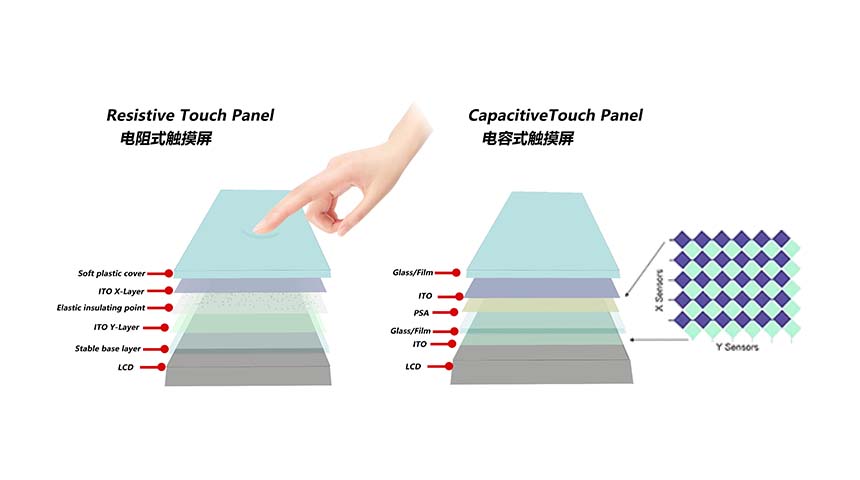
Capacitive Touch Panel or Resistive: Which Suits Your Needs?
-
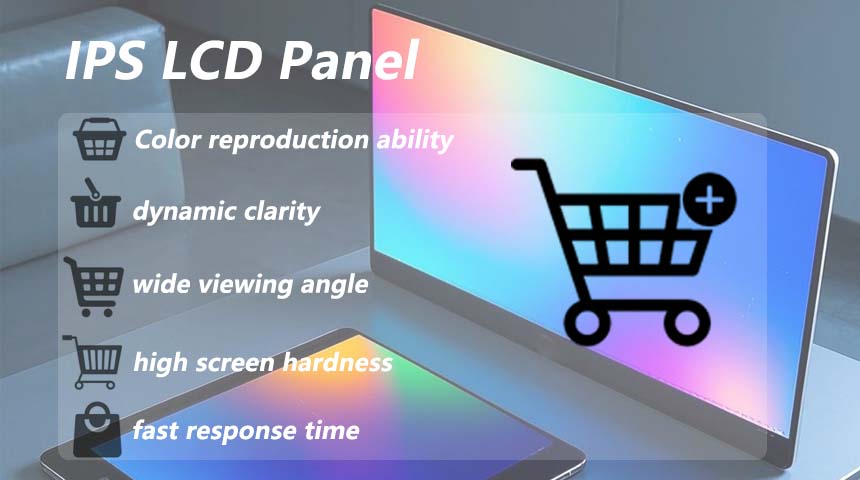
Why Choose an IPS LCD Panel for Your Next Screen Purchase?
-
CDTECH to Showcase Cutting-Edge Display Solutions at SID 2025
-
Comparing Different Types of Displays in Cars: A Detailed Overview
-

White Spots on LCD Screen: Causes, Fixes & Industrial Solutions (2026 Guide)