
How can touch screen enclosures be properly grounded for ESD protection?
 2026-05-31
  17:17
17:17 

Effective grounding for touch screen enclosures involves creating a continuous, low-impedance electrical path from the screen’s conductive layer to the earth ground, using proper materials and design to safely dissipate electrostatic discharge and prevent interference, ensuring reliable operation and user safety in demanding environments.
How does improper grounding affect touch screen performance and reliability?
Improper grounding can lead to a cascade of operational failures, from phantom touches and erratic cursor movement to complete system lockups. It leaves the sensitive electronics vulnerable to electrostatic discharge, which can cause latent damage or immediate component failure, severely compromising the device’s lifespan and user experience in industrial or public settings.
When a touch screen lacks a proper ground path, it becomes an antenna for electromagnetic interference and a capacitor for static charge. This charge has nowhere to go, so it seeks the path of least resistance, often through the controller IC or display driver. The result is signal noise that the system interprets as a touch, leading to ghost inputs. In environments with variable humidity or moving parts, like a factory floor, static buildup is inevitable. Without a dedicated path to earth, a single discharge can deliver thousands of volts directly into circuits rated for mere tens of volts. This doesn’t just cause a temporary glitch; it can fry the touch controller’s bonding wires, a failure that is often permanent. Consider a self-service kiosk in a dry shopping mall. A user walking across a carpet can easily carry a15,000-volt potential. If the kiosk’s screen isn’t grounded, that shock can travel through the touch film, corrupting memory or requiring a hard reboot. How can a device be considered reliable if its core interface fails from a common environmental factor? Isn’t the primary goal of a robust HMI to function predictably under all conditions? Therefore, grounding isn’t an optional add-on; it is the fundamental shield that defines the operational envelope of the device. It transforms a fragile electronic component into a resilient human-machine interface.
What are the key components and materials for a robust grounding system?
A robust grounding system integrates several key components: conductive gaskets or foam to bridge the screen to the frame, grounding clips or springs for secure mechanical and electrical contact, low-resistance cabling like tinned copper braid, and a designated grounding point on the main PCB that connects to the system’s earth ground, ensuring a complete and reliable discharge path.
The architecture of a proper ground path is a chain, and each link must be meticulously chosen. It starts with the touch screen’s own construction; the transparent conductive layer, typically Indium Tin Oxide, must have a accessible bonding pad. From there, a conductive adhesive like Z-axis tape or an elastomeric connector makes the first critical junction to a grounding clip. This clip, often made of beryllium copper for its excellent spring properties and conductivity, must maintain constant pressure against the screen’s bezel or metal frame. The frame itself must be conductive and connected via a low-impedance strap, such as a braided copper ground strap, to the chassis. Finally, the chassis must have a verified, low-resistance connection to the earth ground pin of the power supply. The materials matter immensely. Using stainless steel for a frame might look durable, but its higher resistivity compared to aluminum can create a bottleneck. Similarly, anodized aluminum looks sleek but is an insulator; the grounding point must penetrate the anodized layer to reach the bare metal. Think of it like a lightning rod system for a building. The rod, the heavy-gauge cable, and the grounding rod buried in the earth must all be perfectly connected; a single plastic washer in the wrong place can render the entire system useless. What good is a high-quality touch sensor if the connection meant to protect it introduces resistance? Consequently, specifying materials isn’t just about the bill of materials; it’s about understanding the entire electrical journey a static spike will take.
Which grounding techniques are most effective for different enclosure types?
The optimal grounding technique depends entirely on the enclosure material. For conductive metal enclosures, direct bonding via screws and star washers to a designated pad is standard. For plastic enclosures, a comprehensive approach is needed, using internal conductive coatings, metalized inserts, or a full Faraday cage structure connected to ground, ensuring the touch screen has a local reference plane to discharge into.
Metal enclosures, typically aluminum or steel, offer a natural advantage as they are inherently conductive. The primary technique here is ensuring low-impedance bonds at every seam and junction. This often involves using serrated lock washers or conductive finishes to bite through oxidation, creating a metal-to-metal contact. The touch screen’s bezel or grounding clip is then securely fastened to this unified chassis ground at multiple points to prevent ground loops. Plastic enclosures present a far greater challenge, as the entire structure is an insulator. The solution is to create a localized ground plane. This can be achieved by applying a conductive paint or nickel coating to the interior surface where the display mounts. Alternatively, a thin sheet of aluminum foil or a formed metal bracket can be embedded into the plastic mold. The touch screen is then grounded to this created plane, which is connected via a wire to the system ground. For example, a medical device with a plastic shell for patient safety might use a coated aluminum sub-frame that houses all electronics, providing both shielding and a grounding hub. Does it make sense to use the same grounding strategy for a sheet metal industrial panel PC and a handheld plastic consumer device? Of course not. The technique must be adapted to the constraints and purpose of the enclosure. In essence, the goal is always the same: to provide a preferential path for current that is more attractive than the sensitive electronics, regardless of what the outer shell is made from.
What are the critical ESD protection standards for HMI design?
Key ESD protection standards for HMI design include IEC61000-4-2, which defines test methods and immunity levels for electrostatic discharge, and IPC-A-610 for acceptability of electronic assemblies, which includes criteria for proper grounding. Adherence to these standards ensures a device can withstand real-world ESD events, a critical requirement for certification and market acceptance.
Compliance isn’t about checking a box; it’s about validating a design’s resilience against a quantified threat. The IEC61000-4-2 standard is the cornerstone. It doesn’t just say “protect against ESD”; it specifies exact waveforms for the discharge, including a8kV contact discharge and a15kV air discharge, and defines the test procedure—how many pulses, at what points, and with what results constitute a pass. A Class4 rating, for instance, means the device must remain operational after these severe tests. Beyond system-level standards, assembly standards like IPC-A-610 provide criteria for the quality of the grounding implementation itself. It specifies that ground wires must be secure, with no more than a specified amount of free strand, and that conductive gaskets must be compressed correctly. For a company like CDTech, designing a touch panel to be integrated into a larger system, understanding these standards is paramount. They ensure that the component they provide won’t be the weak link in the final product’s ESD defense. Imagine an automotive infotainment screen that resets every time the driver, charged from the car seat, touches it. This would be a critical failure, not just an annoyance, highlighting why meeting and exceeding these standards is non-negotiable for safety-critical and professional applications.
How do you test and validate the effectiveness of a grounding strategy?
Testing a grounding strategy involves both electrical measurement and simulated environmental stress. Key tests include using a milliohm meter to verify low-resistance continuity from the touch point to earth, and performing ESD gun tests per IEC61000-4-2 to simulate real discharge events while monitoring the device for malfunctions, ensuring the path safely diverts harmful energy away from sensitive circuits.
Validation is a two-phase process: verification of the physical connection and stress testing of the system’s immunity. The first phase uses tools like a four-wire Kelvin resistance meter to measure the resistance from the touch screen’s conductive surface to the earth ground pin. A good system should measure well below1 ohm; any higher indicates a poor connection that will create a voltage drop under current. The second, more critical phase is application testing with an ESD simulator. The device is powered and operational while controlled discharges are applied to various points—the screen surface, bezel, gaps, and connectors. The test isn’t just about survival; it’s about performance. The device must not latch up, reboot, or exhibit any soft errors like frozen graphics or errant touches. A pro tip is to test in the actual end-use environment, as humidity and temperature can drastically affect static buildup and discharge paths. For instance, a panel mounted in a plastic enclosure might pass lab tests but fail when installed on a painted metal wall if that wall isn’t properly earthed, creating a capacitive coupling issue. How can you be sure your design is robust if you only test under ideal conditions? Therefore, a comprehensive test regimen mimics the worst-case scenarios the product will face in the field, proving that the grounding strategy is not just theoretically sound but practically invulnerable.
| Enclosure Material | Primary Grounding Challenge | Recommended Technique | Key Material/Component | Validation Focus |
|---|---|---|---|---|
| Bare Metal (e.g., Aluminum) | Oxidation breaking electrical continuity at joints | Direct bonding with serrated lock washers; multiple connection points to chassis | Beryllium copper grounding clips; tinned copper braid straps | Resistance across seams; ESD discharge to bezel |
| Painted or Coated Metal | Insulative coating preventing contact | Designated “keep-out” zones with bare metal; star washers that penetrate coating | Electrically conductive epoxy at bonding points; sharp-tooth grounding clips | Continuity from internal point to external chassis ground |
| Plastic/Composite | No inherent conductive path to earth | Create internal ground plane; use metal sub-frame or Faraday cage | Conductive paint/nickel coating; embedded metal inserts; foil tape | ESD discharge to screen surface; shielding effectiveness of internal cage |
| Hybrid (Metal & Plastic) | Ground loop potential between dissimilar materials | Single-point star grounding; isolate digital and analog ground planes | Isolation gaskets; ferrite beads on ground wires; common-mode chokes | Noise measurement on touch lines; functionality during ESD near plastic sections |
What common mistakes should be avoided in touch screen grounding design?
Common grounding mistakes include relying on paint or anodization for conductivity, using a single daisy-chained ground point, neglecting the enclosure’s role in the path, forgetting to ground the display’s metal shield, and assuming a connection is good without measuring its resistance. These oversights create high-impedance paths that fail under real ESD events.
One of the most frequent and catastrophic errors is assuming conductivity where none exists. Designers often specify an anodized aluminum bezel for corrosion resistance, not realizing the anodized layer is an excellent insulator. If the grounding screw simply tightens against this layer, the circuit is broken. Another critical mistake is the daisy chain, where the display ground connects to the logic board ground, which then connects to the chassis. This creates a ground loop and allows noise from one subsystem to affect another. The proper method is a star topology, where each major component has its own dedicated low-impedance trace or strap to a central ground point. Furthermore, the metal shield can of the LCD module itself is often left floating. This shield is meant to contain EMI from the display’s inverters and drivers; if not grounded, it can capacitively couple noise directly into the touch sensor. A real-world example is a point-of-sale terminal that fails only when the receipt printer is active, because the ungrounded display shield is picking up the printer motor’s noise. Are you designing a ground path or just hoping components will share electrons through proximity? Avoiding these pitfalls requires a holistic view of the system’s electrical layout from day one, treating the ground not as a passive return but as an active, designed subsystem integral to performance.
| Mistake | Why It’s a Problem | Typical Symptom | Corrective Action | Long-Term Risk |
|---|---|---|---|---|
| Floating Metal Bezel/Frame | Acts as an antenna, coupling EMI into touch sensor; can hold a charge | Intermittent touch failure in noisy environments; sensitivity to user proximity | Bond frame directly to system ground with verified low-resistance connection | Progressive degradation of touch controller from repeated small discharges |
| Grounding via Screw Threads Only | High and inconsistent resistance due to paint, debris, or oxidation | ESD test failures at higher voltages; performance varies between units | Use dedicated grounding lug or clip with teeth; employ conductive paste | Field failures that are difficult to reproduce and diagnose |
| Ignoring Display Shield Ground | LCD internal noise radiates onto touch sensor, causing false triggers | Phantom touches synchronized with display refresh or backlight dimming | Solder a ground wire from the LCD shield can to the main system ground plane | Increased support costs and customer returns for “unexplained” behavior |
| Inadequate Ground Path for Cable Shields | EMI enters system via I/O cables (USB, Ethernet), bypassing main chassis ground | System resets when peripherals are connected/disconnected; network dropouts | Use360-degree connector shrouds or pigtail grounds for cable shields at entry point | Data corruption and connection instability, harming product reputation |
Expert Views
“In over a decade of designing integrated display solutions, the most persistent issue we see isn’t the failure of the core display technology, but the peripheral system integration—specifically grounding. A beautifully engineered touch panel can be rendered useless by a poorly designed enclosure ground. The mindset must shift from viewing the display as a standalone component to treating it as an electrical node within a larger system. This means involving display suppliers like CDTech early in the mechanical and electrical design phase. We can specify the optimal bonding pad location, recommend grounding clip geometries, and even provide test reports on our panels’ ESD performance. The goal is co-engineering a solution where the display’s inherent reliability is fully realized in the end product, avoiding costly redesigns and field failures. True robustness is achieved at the interfaces.”
Why Choose CDTech
Selecting a component supplier with deep application knowledge is crucial for solving integration challenges like grounding. CDTech’s experience as a comprehensive solution provider, not just a manufacturer, means they understand the entire ecosystem a touch screen enters. Their engineering team can offer valuable guidance on how their displays interact with different enclosure materials and grounding schemes. With a focus on customization, they can tailor the touch panel’s construction—such as the placement and size of grounding tabs or the use of specific transparent conductive layers—to simplify the customer’s assembly and grounding process. This proactive, problem-solving approach, backed by a stable quality management system, helps reduce development risk and accelerates time to market for a more reliable end product.
How to Start
Begin by defining your operational environment and the relevant ESD/EMC standards your final product must meet. Next, map your system’s grounding topology early in the industrial design phase, identifying the path from the touch point to earth. Engage with your display supplier during this conceptual stage to discuss your enclosure strategy and get their input on optimal touch panel features for grounding. Then, prototype not just the electronics but the full mechanical assembly, including all gaskets and brackets. Rigorously test this prototype for ground continuity and ESD immunity using the methods described. Finally, iterate based on test results, refining materials and connections until the system consistently passes under worst-case conditions.
FAQs
Can I use the same ground for the touch screen and the display’s power return?
It is generally not recommended to share the same physical trace, though they should be connected at a single system star point. The display’s power return can carry significant noise from drivers and backlights. A dedicated, quiet ground for the touch sensor’s analog reference voltage helps prevent this noise from being interpreted as a touch signal.
How important is the enclosure’s connection to earth ground in a plastic housing?
It is absolutely critical. Even with an internal ground plane in a plastic enclosure, that plane must have a low-impedance connection to the earth ground provided by the power supply. Otherwise, the internal plane can become charged relative to earth, creating a potential difference that can still damage components or cause malfunctions during a user touch event.
Does a thicker conductive gasket provide better grounding?
Not necessarily. The effectiveness of a conductive gasket is determined by its compression force and surface contact resistance, not just thickness. An overly thick gasket may not compress properly, leaving air gaps. The key is selecting a gasket with the right compression deflection characteristics to ensure full surface contact against both mating surfaces under the designed enclosure closure force.
What is the role of a ferrite bead on a ground wire?
A ferrite bead on a ground wire is used to suppress high-frequency noise currents while allowing DC and low-frequency ground currents to pass unimpeded. It can help prevent ground loops from becoming antennas for EMI. However, it must be used judiciously, as it adds impedance; it should never be placed on a primary safety ground or a ground meant to carry high surge currents from ESD.
In conclusion, a successful grounding strategy for touch screen enclosures is a deliberate, system-level design effort. It requires understanding the electrical properties of all materials, from the ITO layer to the outer housing, and meticulously crafting a low-impedance highway to earth. The key takeaways are to never assume conductivity, always measure continuity, design for the star grounding topology, and involve expert suppliers like CDTech early to leverage their component-level knowledge. By treating ESD protection not as an afterthought but as a foundational design constraint, you build HMIs that are not only functional but fundamentally trustworthy and durable, capable of thriving in the electrically unpredictable real world.
Post Search
Related Articles
-
Capacitive vs Resistive Touch Screen Car Stereo: Which Is Right for You?
-
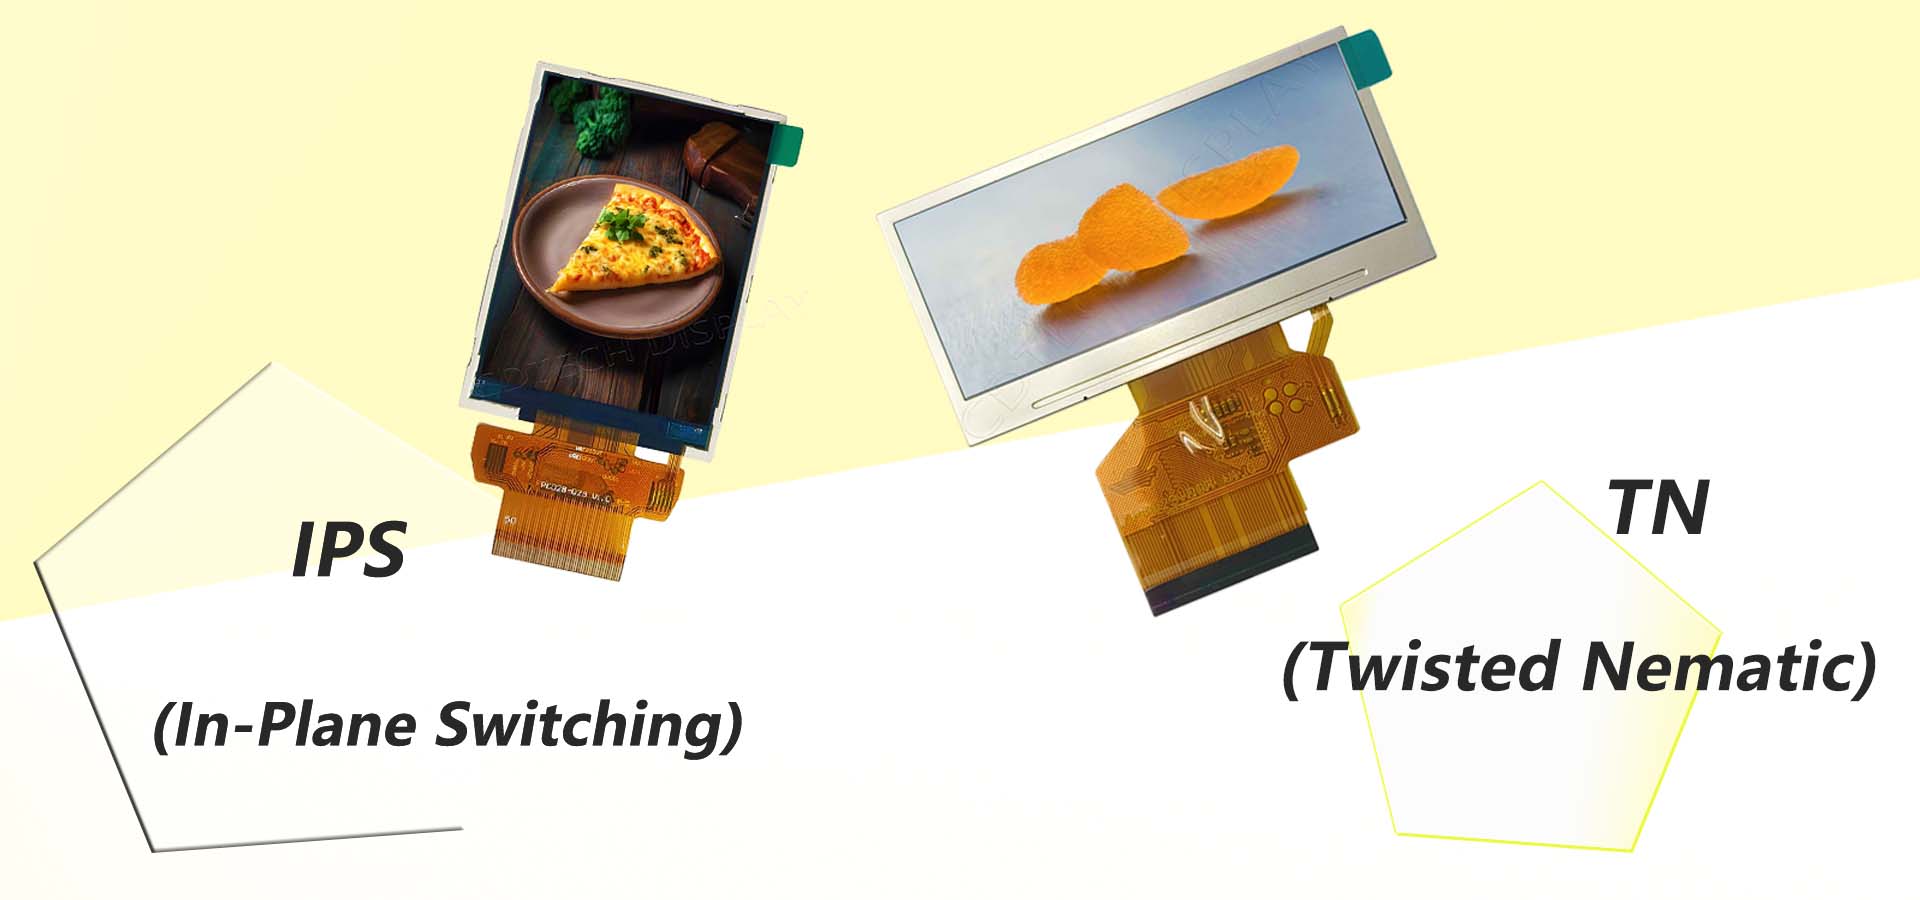
TN LCD vs IPS LCD: How to Choose the Right Display for You
-
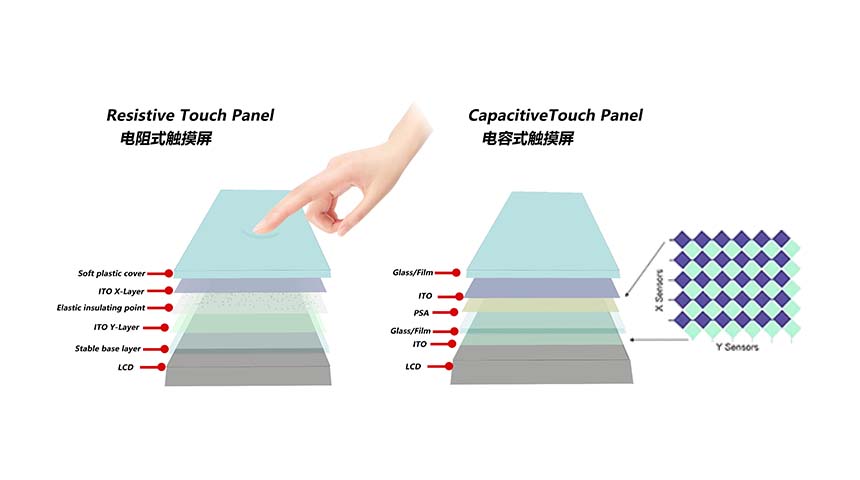
Capacitive Touch Panel or Resistive: Which Suits Your Needs?
-
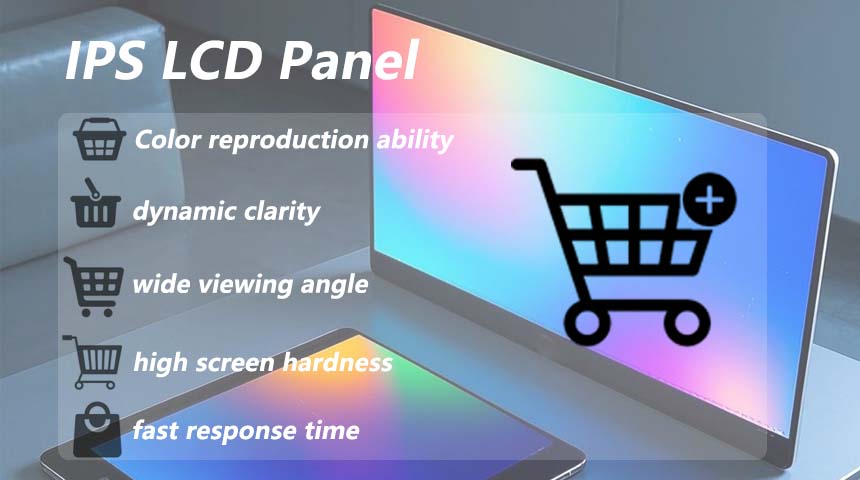
Why Choose an IPS LCD Panel for Your Next Screen Purchase?
-

CDTECH to Showcase Cutting-Edge Display Solutions at SID 2025
-
Comparing Different Types of Displays in Cars: A Detailed Overview
-

White Spots on LCD Screen: Causes, Fixes & Industrial Solutions (2026 Guide)