
How can a touch evaluation board verify HMI sensitivity?
 2026-05-18
  22:59
22:59 

Using a capacitive touch evaluation board is the most effective way to verify your HMI design’s sensitivity and performance before investing in a custom PCB. These kits allow you to test different sensor patterns, materials, and controller configurations in a real-world environment, providing critical data to refine your touch interface and ensure a flawless user experience.
How do capacitive touch evaluation boards work?
Capacitive touch evaluation boards function as a complete, ready-to-use system for prototyping touch interfaces. They typically integrate a touch sensor, a microcontroller with dedicated firmware, and connectivity options to a host PC. The board allows engineers to measure and analyze the minute changes in capacitance caused by a finger’s proximity, translating them into reliable touch coordinates.
At their core, these boards operate by creating an electrostatic field over a grid of transparent electrodes, usually made from Indium Tin Oxide (ITO). When a conductive object like a finger disrupts this field, the board’s dedicated controller IC measures the localized change in capacitance. This data is processed through algorithms for noise filtering, baseline calibration, and gesture recognition before being output via a standard protocol like I2C. The real power of an eval kit lies in its accompanying software suite, which provides a graphical interface to visualize touch points in real-time, adjust sensitivity thresholds, and monitor signal strength. This is akin to using a diagnostic scanner on a car; instead of guessing why an engine is misfiring, you get live data streams and parameter controls to pinpoint and solve the issue. Why would you commit to a full production run without first observing how your specific cover lens material affects the signal-to-noise ratio? How can you be sure your chosen sensor pattern is immune to common environmental interference without empirical testing? The evaluation board answers these questions definitively. By offering a sandbox for experimentation, it bridges the gap between theoretical datasheet specifications and the messy reality of integration, ultimately de-risking the development cycle.
What are the key benefits of using a PCAP test board in development?
Employing a PCAP test board during the development phase offers substantial advantages, primarily risk mitigation and accelerated time-to-market. It allows for hands-on validation of touch performance under real-world conditions, enabling engineers to identify and resolve integration issues early, long before the costly custom PCB fabrication stage.
One of the paramount benefits is the ability to empirically validate the touch controller’s performance with your specific stack-up, including the cover glass or plastic, adhesive layers, and display. You can test for factors like linearity, edge performance, and multi-touch tracking accuracy, which are difficult to simulate accurately. Furthermore, these boards are indispensable for tuning the firmware parameters, such as the scan frequency, filter coefficients, and detection thresholds, to match your application’s unique electrical environment. This tuning process is critical for achieving a robust touch response that isn’t fooled by power supply noise or EMI from nearby components. For instance, developing a medical device that must work flawlessly while a motor is running nearby would require testing and adjusting the touch system’s noise immunity on an eval board first. Without this step, you might discover the interference issue only during final system testing, leading to expensive PCB spins and project delays. What if the chosen controller struggles with the water rejection algorithm needed for your outdoor kiosk? Can you confidently specify the thickness of the cover glass without testing its impact on sensitivity? A PCAP test board provides the platform to answer these questions with data, not speculation. Consequently, it transforms the development process from a hopeful series of assumptions into a methodical, evidence-based engineering exercise, ensuring the final product meets both performance expectations and user satisfaction.
Which specifications should you compare when selecting a touch evaluation kit?
Choosing the right touch evaluation kit requires careful comparison of several technical specifications that directly impact your prototyping goals. Key factors include the supported sensor type and size, the controller IC’s feature set, the quality of the development software, and the available documentation and community support.
You should first ensure the kit supports the sensor technology and size relevant to your project, whether it’s a self-capacitive button array or a mutual-capacitive multi-touch matrix. The heart of the kit is the controller IC, so scrutinize its specifications for the maximum supported sensor channels, report rate, power consumption, and integrated features like waterproofing, glove touch, or active stylus support. The accompanying PC software is equally crucial; a powerful GUI that offers real-time signal plotting, gesture debugging, and easy parameter tuning can save weeks of development time. It’s similar to choosing a scientific calculator over a basic one; both can perform calculations, but the scientific model provides advanced functions and visual feedback that solve complex problems more efficiently. Does the kit provide schematic and layout files for its sensor design, offering a reference for your own PCB? How comprehensive is the manufacturer’s application note library for tackling common design challenges? These resources are often as valuable as the hardware itself. Additionally, consider the kit’s connectivity options, such as USB or Arduino headers, which affect how easily it integrates into your existing test setup. By methodically evaluating these specifications against your project’s requirements, you select not just a piece of test equipment, but a development partner that will guide you from concept to a production-ready design.
What are the common challenges in touch sensitivity testing and how can eval boards help?
Common challenges in touch sensitivity testing include dealing with electrical noise, compensating for various overlay materials, achieving consistent performance across the entire sensor, and ensuring reliable operation in harsh environments. Evaluation boards provide the tools and visibility needed to diagnose, measure, and systematically overcome these hurdles through firmware adjustments and hardware modifications.
Electrical noise from power supplies, displays, or other digital circuits is a pervasive issue that can cause false touches or reduce sensitivity. Eval boards allow you to monitor the raw capacitive signals and apply digital filters to suppress noise without degrading the touch response. Another major challenge is the impact of the cover material; thicker glass or plastic overlays attenuate the capacitive field, requiring higher controller sensitivity. With a test board, you can physically swap different overlay samples and immediately see the effect on signal strength, enabling you to define the optimal thickness and material grade. Achieving uniform sensitivity, especially at the edges and corners of the sensor, is also tricky due to fringing field effects. The visualization tools in the evaluation software can map sensitivity across the entire surface, highlighting weak spots that may need a redesigned sensor pattern. Imagine trying to tune a piano by ear alone versus using a digital tuner; the eval board provides the precise, visual feedback necessary to make accurate adjustments. How will you quantify the improvement from a new grounding scheme without a baseline measurement? Can you prove your design meets the required signal-to-noise ratio for reliable glove operation? The evaluation kit turns subjective feel into objective data. By methodically addressing each challenge on the test platform, you build a robust touch system that performs reliably in the final product, avoiding costly field failures and customer returns.
How do you integrate findings from an eval kit into a custom PCB design?
Integrating findings from an evaluation kit into a custom PCB design is a systematic process of translating empirical data into design rules. The insights gained inform critical decisions regarding sensor layout, PCB stack-up, component placement, and firmware configuration, ensuring the custom design replicates the proven performance of the prototype.
The first step is to adopt the sensor pattern and routing strategy validated on the eval board. This includes trace width, spacing, and the use of ground shields to prevent noise coupling. The component placement and power supply decoupling scheme from the reference design should be closely followed, as these directly affect signal integrity. The firmware parameters you painstakingly optimized—such as detection thresholds, filter settings, and calibration routines—must be ported to the codebase for your custom board’s microcontroller. It is a process akin to a chef finalizing a new recipe; the test kitchen (eval board) is where proportions and cooking times are perfected, and those exact specifications are then used in the main restaurant kitchen for consistent, high-quality results. Have you accounted for the slight parasitic capacitance differences introduced by your PCB manufacturer’s process? Does your layout maintain the same careful separation between noisy digital lines and sensitive sensor traces? The evaluation phase provides the confidence to proceed, but the integration phase requires disciplined attention to detail. Furthermore, you should plan for a validation phase on the first custom PCB prototypes, using the same test methodologies to confirm performance parity. This closed-loop process, from eval board to custom PCB and back to testing, ensures that the lessons learned during prototyping are not lost in translation, leading to a first-pass-success design that meets all touch performance specifications.
What is the typical workflow for HMI verification using an evaluation kit?
The typical workflow for HMI verification using an evaluation kit is an iterative cycle of configuration, testing, measurement, and refinement. It begins with setting up the hardware and software, proceeds through baseline performance testing, introduces real-world variables and stressors, and concludes with data analysis and parameter optimization to meet the target specifications.
You start by connecting the evaluation board to your PC and launching the configuration software to establish a baseline. Initial tests involve checking basic functionality—ensuring touches are registered accurately and that the signal is stable with no false triggers. Next, you introduce your specific application conditions, such as attaching the intended cover lens, operating the device with a gloved hand, or submerging the sensor under a water film to test rejection algorithms. Throughout this process, you use the software tools to capture quantitative data like signal delta, noise levels, and touch coordinate accuracy. This phase is comparable to stress-testing a new bridge design with scaled models in a wind tunnel before construction; you are simulating every conceivable operating condition to uncover weaknesses. Are the touch coordinates still linear when the device is powered from a noisy battery charger? Does the firmware’s automatic calibration routine handle the temperature drift expected in an automotive dashboard? The evaluation kit provides the means to ask and answer these critical questions. Based on the collected data, you then iteratively adjust controller settings, potentially modify sensor design files, and retest until the system performs robustly under all required conditions. This methodical workflow transforms HMI verification from a final gatekeeping step into an integral, proactive part of the design process, ensuring a high-quality user experience.
| Feature Category | Basic Evaluation Kit | Advanced Evaluation Kit | Application-Specific Kit |
|---|---|---|---|
| Primary Use Case | Learning controller basics, simple button/gesture prototyping | Full system integration testing, performance tuning for complex projects | Validating performance for niche requirements (e.g., automotive, industrial) |
| Typical Controller Features | Basic mutual capacitance, limited channels, standard gesture library | High channel count, advanced features (waterproofing, glove touch, stylus), high report rate | Features tailored to environment, like wide temperature range, high EMI immunity, or specific safety certifications |
| Software & Debugging Tools | Basic configuration GUI, limited real-time data visualization | Comprehensive IDE with signal profiling, gesture debugger, data logging, and scripting | Specialized software for stress testing and compliance with industry standards |
| Sensor Flexibility | Fixed sensor pattern on the supplied board | Often includes breakout boards for connecting custom sensor patterns or different sizes | May include sensors with specific constructions, like curved surfaces or ruggedized overlays |
| Documentation & Support | Datasheet and quick-start guide | Full application notes, design guides, schematic/layout files, and active user community | Technical white papers, compliance test reports, and direct engineering support access |
| Development Phase | Key Activities with Eval Board | Metrics to Measure | Common Pitfalls to Avoid |
|---|---|---|---|
| Initial Concept & Feasibility | Testing touch technology suitability, basic gesture recognition, overlay material impact | Signal strength with target overlay, baseline noise floor, gesture accuracy rate | Choosing a controller without sufficient channel count for future features, ignoring power consumption early on |
| Prototype Integration | Connecting to host system MCU, testing communication protocols, co-existing with display and other subsystems | I2C/SPI communication error rate, touch report latency, interference from display refresh | Poor PCB layout on initial prototype that couples display noise into touch sensor, inadequate grounding |
| Performance Optimization | Tuning sensitivity, filter coefficients, calibration routines, and advanced features (glove, waterproof) | Signal-to-Noise Ratio (SNR), linearity error, water rejection success rate, power consumption in different modes | Over-filtering signals which increases latency, setting sensitivity too high and causing false touches |
| Pre-Production Validation | Environmental stress testing (temperature, humidity), EMC pre-compliance, durability testing | Performance drift over temperature range, immunity to ESD and RF interference, long-term reliability | Failing to test across the full supply voltage range, not validating with final enclosure and gasket materials |
Expert Views
The strategic use of capacitive touch evaluation kits is no longer a luxury but a necessity in modern product development. From an engineering perspective, these platforms provide the essential data link between the analog world of capacitive sensing and the digital domain of system design. They allow us to move beyond theoretical models and confront the practical realities of noise, material variances, and environmental stressors. A well-chosen eval kit doesn’t just test if a touch works; it quantifies how well it works under pressure, providing the metrics needed to make informed trade-offs between sensitivity, power, cost, and robustness. The most successful projects I’ve seen treat the evaluation phase as a discovery process, not just a checkbox. They use the kit’s tools to ask “what if” and build a deep understanding of their specific touch system’s behavior, which pays dividends in a smoother transition to production and a more reliable end product.
Why Choose CDTech
CDTech brings over a decade of specialized experience in display and touch integration to the table, which informs their understanding of the entire system, not just an isolated component. This holistic view is crucial because touch performance is deeply interdependent with the display, enclosure, and electronics. When you engage with CDTech, you benefit from their practical knowledge of how different cover glass materials affect capacitance, what layout techniques minimize noise, and how to structure a stack-up for optimal optical and tactile performance. Their expertise is particularly valuable in navigating the customization process, helping you avoid common pitfalls that can derail a project. The company’s focus on providing solutions, not just parts, means they approach challenges with an engineering mindset, offering insights that can streamline your verification process and lead to a more robust HMI design.
How to Start
Initiating your touch sensitivity verification with an evaluation board is a straightforward process. First, clearly define your project’s key requirements, such as the required touch points, overlay material and thickness, operating environment, and any special needs like glove or water operation. Next, research and select an evaluation kit whose controller IC and feature set align with these requirements. Once the kit arrives, dedicate time to thoroughly explore its software and hardware, running through the provided tutorials to understand its capabilities. Then, begin testing with your specific parameters—attach samples of your intended cover material, simulate noise conditions, and start collecting performance data. Use this data to iteratively adjust settings and assess if the chosen technology meets your goals. This hands-on phase is where you’ll uncover valuable insights that will directly inform your custom PCB schematic, layout, and firmware, setting a solid foundation for your final product.
FAQs
Can I use an evaluation board to test my own custom sensor design?
Yes, many advanced evaluation kits include breakout headers or daughter board connectors specifically for this purpose. You can design and fabricate a custom sensor pattern on a flexible PCB (FPC) or a rigid board and connect it to the eval kit’s controller. This allows you to verify the performance of your unique sensor geometry, size, and electrode pattern before finalizing the design for your custom PCB.
How long does the typical evaluation and testing phase take?
The duration varies significantly based on project complexity, but a thorough evaluation phase typically ranges from two to six weeks. Simple button interfaces may be validated quickly, while complex multi-touch systems requiring extensive tuning for noise immunity, waterproofing, and glove touch will need a longer, more iterative testing period to achieve robust performance.
What is the difference between mutual-capacitance and self-capacitance evaluation kits?
Mutual-capacitance kits are designed for multi-touch sensors where a grid of transmit and receive electrodes detects touches precisely. Self-capacitance kits are used for simpler applications like buttons or sliders, where each electrode is measured independently against ground. The choice depends entirely on your application’s need for multi-touch functionality versus simpler, cost-effective single-touch input.
Do I need to write code to use a touch evaluation kit?
For initial testing and parameter tuning, usually no code is required as the manufacturer’s PC software provides a graphical interface. However, to integrate the touch controller with your own microcontroller later, you will need to implement or adapt the driver code and communication protocol (like I2C) to read touch data and potentially configure the controller from your application firmware.
What should I do if my evaluation results show poor signal-to-noise ratio?
A poor SNR indicates excessive noise or weak signal. First, use the eval board’s tools to identify the noise source—common culprits are switching power supplies or display cables. Improve sensor shielding, ensure proper grounding, and adjust the controller’s filter settings. If the signal is weak, consider reducing overlay thickness, using a controller with higher drive capability, or modifying the sensor pattern to increase electrode area.
In conclusion, leveraging a capacitive touch evaluation board is a non-negotiable step for developing a reliable and high-performing HMI. It transforms the design process from speculative to empirical, providing the data and hands-on experience needed to make critical decisions about sensors, controllers, materials, and firmware. The insights gained directly de-risk the subsequent custom PCB design, preventing costly re-spins and ensuring the final product delivers a seamless user experience. By methodically following a verification workflow—from baseline testing to environmental stress testing—you can confidently translate a prototype’s performance into a production-ready design. Remember, the goal is not just to make a touchscreen work, but to make it work flawlessly under all intended conditions, and an evaluation kit is the most effective tool to achieve that certainty.
Post Search
Related Articles
-
Capacitive vs Resistive Touch Screen Car Stereo: Which Is Right for You?
-
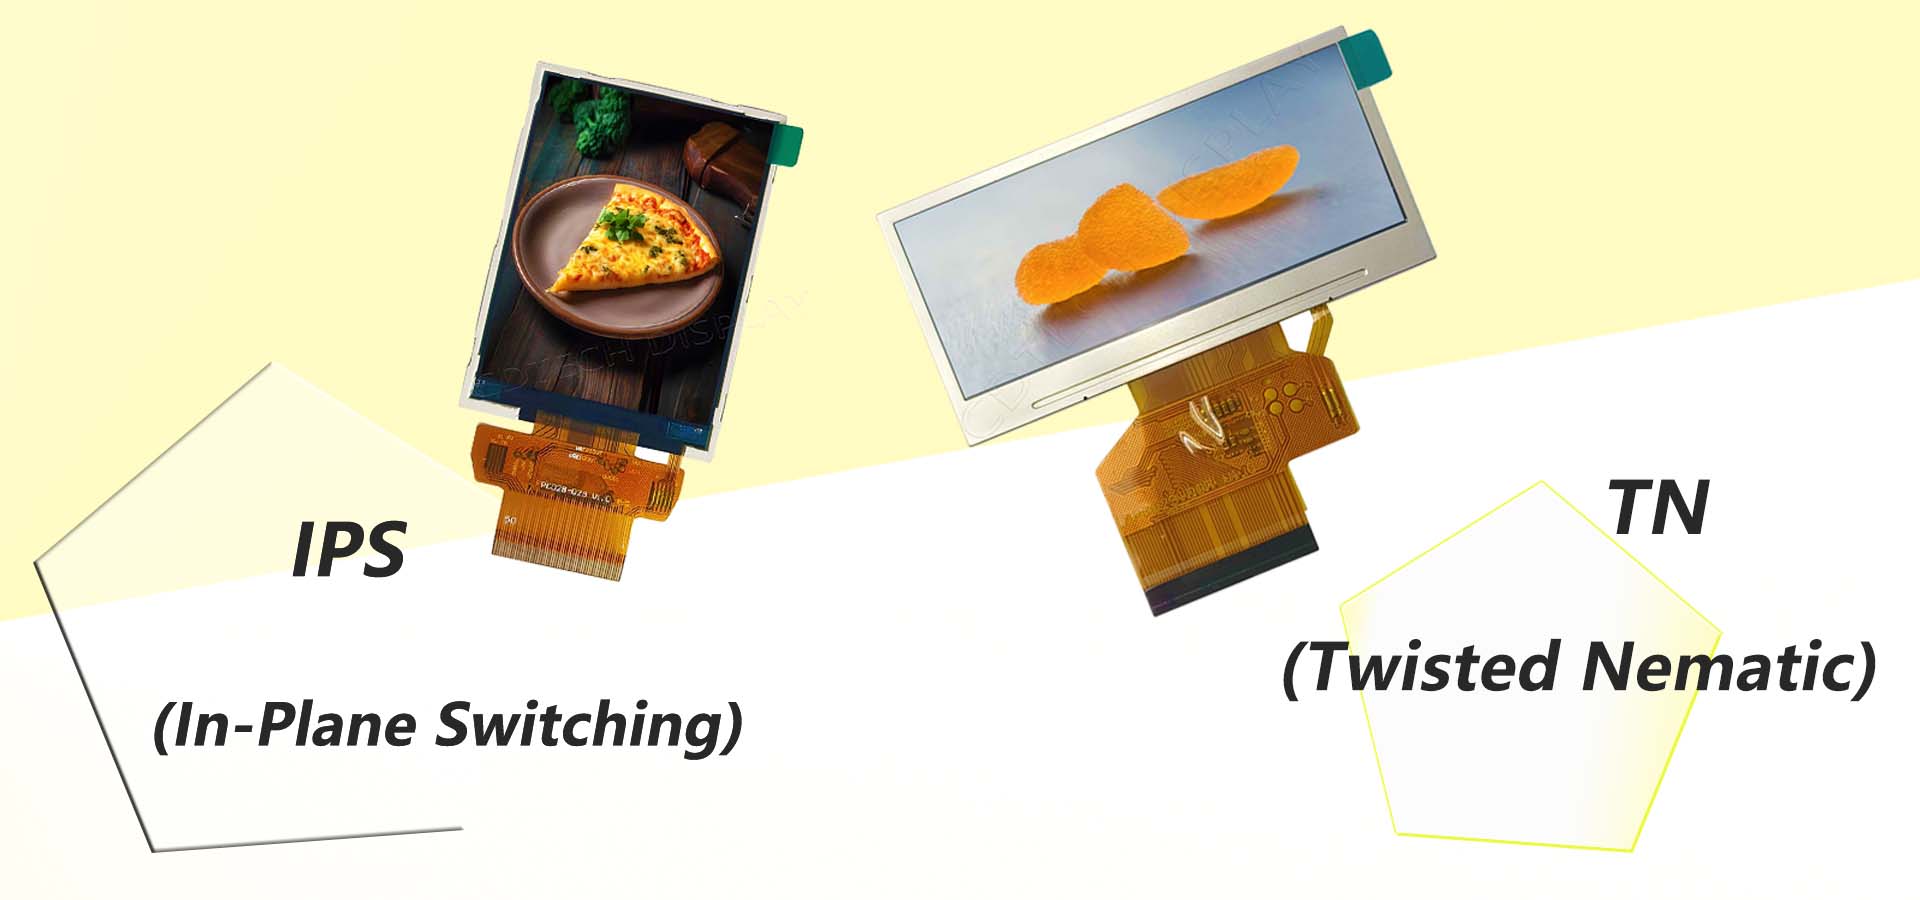
TN LCD vs IPS LCD: How to Choose the Right Display for You
-
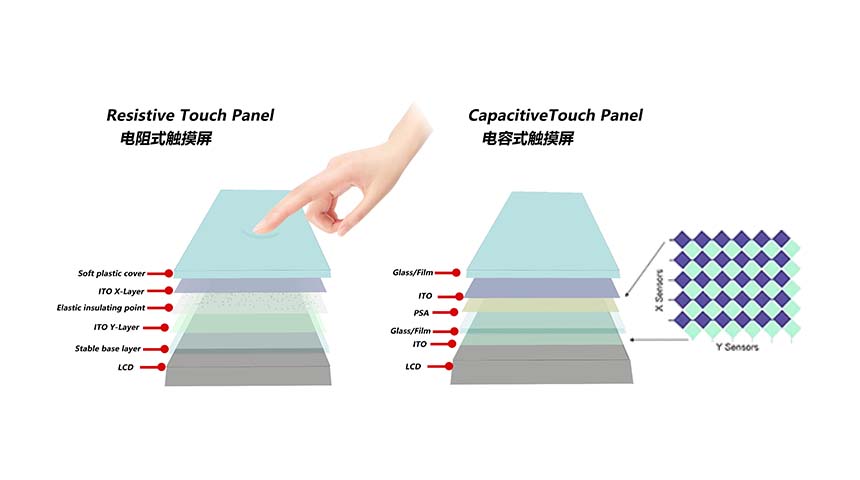
Capacitive Touch Panel or Resistive: Which Suits Your Needs?
-
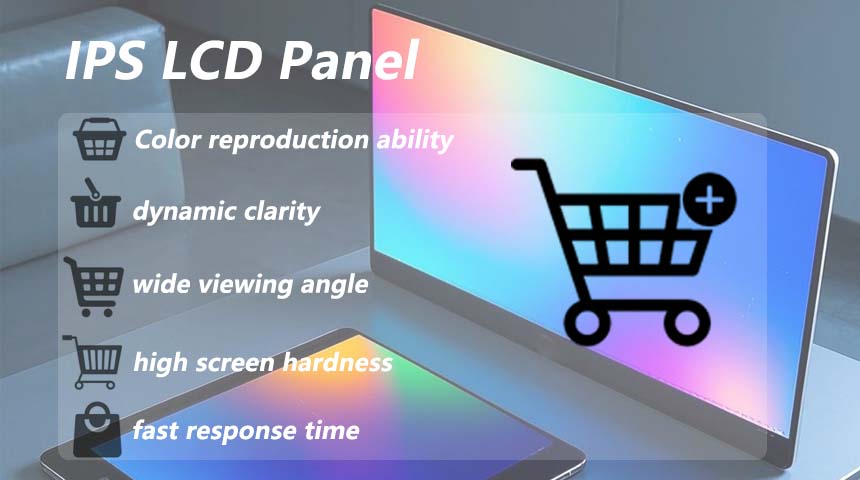
Why Choose an IPS LCD Panel for Your Next Screen Purchase?
-
CDTECH to Showcase Cutting-Edge Display Solutions at SID 2025
-
Comparing Different Types of Displays in Cars: A Detailed Overview
-

White Spots on LCD Screen: Causes, Fixes & Industrial Solutions (2026 Guide)